 Arguably one of the best perks of blogging is the ability to connect with others who share a similar passion, and form genuine friendships in the process. I am so thankful that I met highly talented, especially thoughtful and caring blogger, Hanaâ of “Hanaâ’s Kitchen,” who has not only taught me a great deal about baking, but has also been a strong support along the way. I am so excited to be joining a fantastic group she began called the Avid Baker’s Challenge. Currently baking out of The Weekend Baker by Abigail Dodge, the avid bakers make a selected recipe together each month and then share their results. For May, our project was scones, with the flavor profile baker’s choice. Oh, the possibilities! Seriously, I played around with different combinations for the majority of the month of April. Does your mind ever wander to ponder the potential taste of a soon-to-be-made baked good, or is it just me?
Originating in Scotland, the first scones were made with oats, shaped into a large round, scored into four or six wedges (triangles) and griddle-baked over an open fire (later, a stovetop) like a thick pancake. With the advent of baking soda in Victorian times, scones were baked and transformed into customizable teatime accompaniments. With strong historical ties to England as well, scones are steeped in British tradition, and are a distant relative of the crumpet and English muffin. Unfortunately, they are often known to be dry as a bone, tasteless, and only made palatable by the addition of plenty butter, clotted cream, jam, or lemon curd. Their modern American counterpart, a quick bread closely related to biscuits, reflects our taste for rich, sweet breakfast pastries. Through the years, scones became coffee shop regulars, usually over-sized, misshapen muffin or cake-like objects, far removed from their British ancestors.
Since the last time I made a batch, I read about a variety of techniques aimed at creating the ultimate light and flakey scone, avoiding heavy, leaden variations at all costs. One method focuses on incorporating the butter, as lofty pastry depends on distinct pieces of butter distributed throughout the dough that melt during baking, allowing steam to escape and leaving pockets of air behind. To achieve this, the butter must be as cold and solid as possible until baking. The problem with traditional methods of cutting butter into flour, either with your fingers or a food processor, is that the butter becomes too warm during the process. A number of sources. including Cooks Illustrated and one of my favorite cookbooks, A Passion for Baking by Marcy Goldman, point to a fresh idea- freezing the butter and grating it on the large holes of a box grater before quickly and evenly cutting it into the flour. This succeeds at keeping the butter cold, and the the interior of the resulting scone tender and moist without being overly dense. I couldn’t wait to try such a novel concept, and this baking assignment seemed like the perfect opportunity.
I also called upon numerous other tips I found through research in my quest to achieve my best ever scones:
- Just as the lightest bread is produced from the wettest dough, scone dough should be quite soft- resist the temptation to work more than 1-2 tablespoons of additional flour into the dough, just enough to facilitate handling.
- Don’t overmix! In fact, work it as lightly and minimally as possible. Never knead the dough (beyond bringing it together) to avoid activating the gluten in the flour any more than necessary.
- When shaping, either form a round and cut into wedges, or use a biscuit cutter, however, don’t twist it when you push down. It will seal the edges of the dough and prevent the scone from rising as high as possible.
- If you use an egg wash or dairy glaze on top of your unbaked, cut scones, try not to let it drip down the sides. This also inhibits the rise.
- Before a trip through the oven, chill scones for about 15 minutes in the freezer or an hour in the fridge- ensure the pieces of butter throughout are as cold and solid as possible.
- Add ½ cup of water to a pan and place on the lower rack of the oven 10 minutes before you bake the scones- this will create a steamy environment that will assist with the rise. Also, bake scones in the upper third of the oven.
- Don’t overbake or the resulting scones will be dry and crumbly. Look for bottoms that are golden brown and tops that are set but only lightly golden.
- You can freeze scones before baking and pull them out as needed- simply shape, cover with plastic wrap and freeze until solid, about an hour. Bag airtight and return to the freezer. When you’re ready to bake, there’s no need to thaw them; just place frozen scones on a pan, and bake as directed, giving them about 5 additional minutes.
- Although scones are best eaten straight from the oven, and certainly the day they’re made, leftover baked scones can be frozen too. When you want to serve, the author recommends that you thaw and reheat them in a skillet or griddle, covered with foil or a lid, heating on low to medium-low until warmed through.
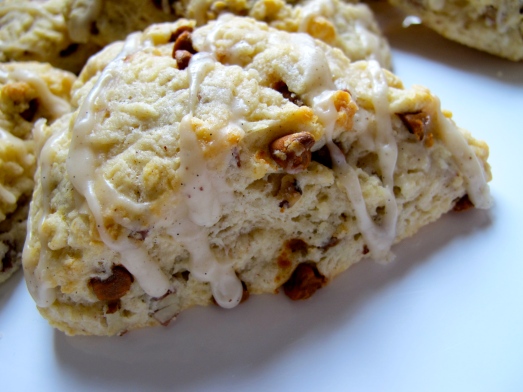
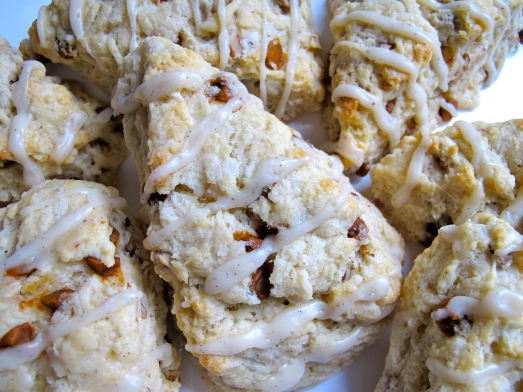
So did my batch benefit from all the tips and tricks I found? Well, their crisp outer crust gave way to a light, fluffy, moist interior packed with layer upon layer of flakey goodness. A slight tang from the buttermilk paired beautifully with the warmth of the spicy cinnamon and toasty pecans, and was foiled by the sweet nuttiness of the brown-butter vanilla bean glaze. Tender and buttery, these scones made my inspiration (a scone often ordered by my Mom along with her latte) a distant memory. Let’s just say they were my first ABC success, and I can’t wait to explore all the recipes to come. Don’t forget to check out what all the other bakers’ made this month, and grab a copy of The Weekend Baker. Thanks again Hanaâ for including me and making me feel so welcome ![]()
Note: To recreate my flavor profile- add 1/4 tsp cinnamon to the dry ingredients, and stir in 2 oz cinnamon chips and 1 1/2 oz chopped toasted pecans (about 3/4 c add-ins total). While the scones are baking, make a half-batch of this glaze, using an equal amount of vanilla bean paste (one of my FAVORITE ingredients… I love those magical little black dots!) instead of vanilla extract. Drizzle over the cooling scones and Viola!


